

Table of Contents
- Why Foam Shreds and How to Prevent It
- Best Tools for Cutting Foam Cleanly
- Step-by-Step Process for Clean Foam Cuts
- How to Cut EVA Foam for Cosplay and Crafts
- How to Smooth Foam Edges After Cutting
- Safety Precautions and Health Considerations
- Common Mistakes to Avoid
- Conclusion
- Frequently Asked Questions
Last Updated: September 4, 2026
Why Foam Shreds and How to Prevent It
Foam shreds when the cutting edge drags through the material instead of slicing cleanly. The real culprit is often the foam type and friction generated by the blade itself.
Different foams behave differently: soft upholstery foam compresses under pressure, while rigid insulation boards resist the blade. The single biggest factor in preventing shredding is matching your tool to the foam density.
Test your blade on a scrap piece first. If the edge leaves crumbs or a rough surface, your blade is too dull or you're applying too much downward force.
Best Tools for Cutting Foam Cleanly
Choosing the right tool depends on foam density, measured in Indentation Load Deflection (ILD) ratings, the force needed to compress foam by 25 percent. Understanding your foam's ILD helps you select the correct cutting method.
Soft foams (ILD 20-40): These compress easily and respond well to serrated knives and electric carving knives. A sharp utility knife works for thin sheets under 1 inch thick; let the blade's weight do the work rather than pressing down hard.
Medium-density foams (ILD 40-80): A sharp utility knife works but may require multiple passes. An electric carving knife prevents compression buildup. Hot wire cutters are effective for polystyrene and polyethylene closed-cell foams.
Rigid foams (ILD 80+): High-density insulation boards require thermal or motorized methods. A hot wire cutter is the gold standard because the heated wire melts through cleanly without compression or friction. A rotary shear or oscillating saw also works well for straight cuts.
| Foam Density (ILD) | Best Primary Tool | Secondary Option | Why It Works | Common Mistake |
|---|---|---|---|---|
| Soft (20-40) | Serrated knife or electric carving knife | Sharp utility knife | Teeth grip compressed foam; reciprocating blades prevent compression | Using a dull blade, which crushes cells instead of slicing |
| Medium (40-80) | Sharp utility knife (multiple passes) or electric carving knife | Hot wire cutter | Multiple passes allow clean slicing; electric blades reduce drag | Trying to cut through in one pass with excessive pressure |
| Rigid (80+) | Hot wire cutter | Rotary shear or oscillating saw | Heated wire melts through without friction; motorized tools prevent binding | Using a manual blade, which causes tearing and binding |
Manual Cutting Tools
For thin sheets under 1 inch, a sharp utility knife works on soft and medium-density foams. A serrated knife suits softer foams but tears rigid foam. Expect 2-3 passes on medium-density foams rather than one aggressive cut.
Electric and Motorized Methods
An electric carving knife suits thick upholstery and medium-density foam; reciprocating blades prevent compression. For rigid insulation, a rotary shear or oscillating saw offers better control and reduces effort.
Thermal Cutting Techniques
A hot wire cutter is the gold standard for rigid foams; the heated wire melts through cleanly and leaves a sealed edge. Account for slight material loss (kerf) when measuring. Thermal cutting releases fumes, so ventilation is essential.
Step-by-Step Process for Clean Foam Cuts
Preparation matters more than technique.
Preparing Your Foam and Workspace
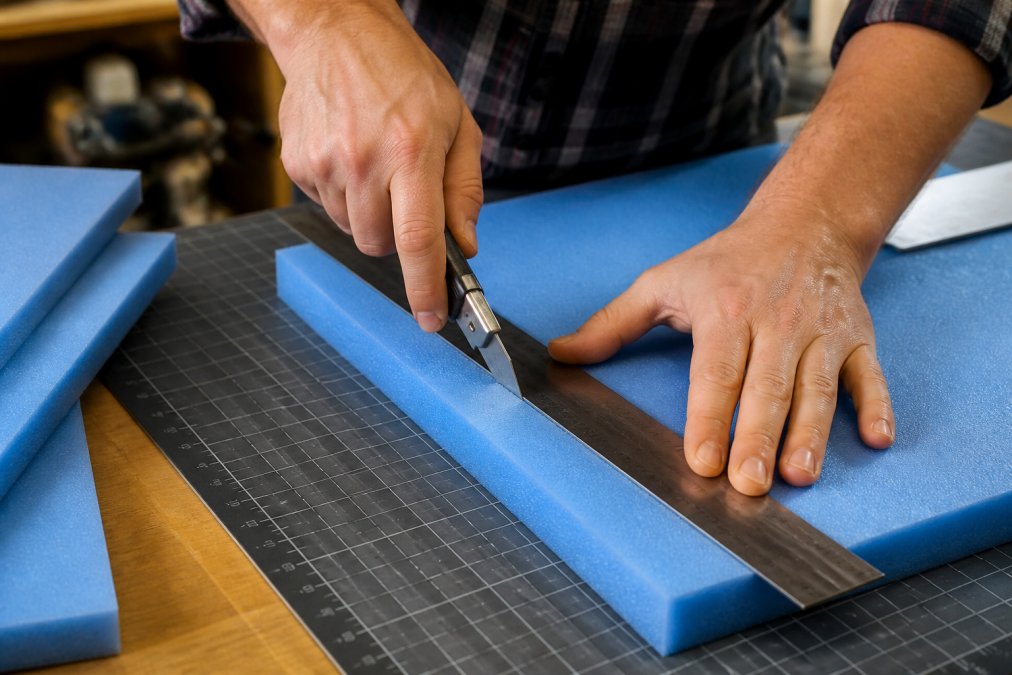
Place foam on a flat surface with a self-healing cutting mat. Mark your cut line clearly with a straight edge and hold the foam firmly to prevent shifting.
Cutting Straight Edges vs. Curved Cuts
For straight cuts, score with moderate pressure, then make a second pass. For curved cuts, use short strokes and rotate the foam rather than forcing the blade around the curve.
Blade Lubrication and Maintenance
Lubricating your blade reduces friction, the primary cause of shredding. Apply silicone spray or mineral oil to the blade before cutting for a noticeably smoother edge.
How to Cut EVA Foam for Cosplay and Crafts
EVA foam is dense and requires a different approach than soft foam. A sharp utility knife works for sheets up to 8 mm thick. Heat the blade slightly with a heat gun for cleaner cuts; work on a scrap piece first to find the right temperature. For detailed shapes, cut slightly outside the line and sand to the exact line afterward.
How to Smooth Foam Edges After Cutting
Even with the best technique, some cuts produce rough edges. The finishing method depends on foam type, damage severity, and desired appearance.
Sanding and Abrasive Finishing
Use fine-grit sandpaper (220 grit or higher) with minimal pressure to remove loose crumbs. For EVA and rigid foam, a rotary tool speeds the process. For soft foam, hand-sand in one direction to avoid divots. After sanding, wipe with a damp cloth to remove dust before gluing or painting.
Thermal Sealing and Smoothing
A heat gun can seal edges on polyethylene and EVA foam. Pass it over the edge at 4-6 inches distance, keeping it moving to avoid melting. For rigid foam, use heat as a finishing touch after sanding. Trade-off: thermal sealing darkens the surface and creates a glossy finish that may not match the material.
Edge Wrapping and Reinforcement
Wrapping edges with fabric tape or self-adhesive foam trim provides protection and a finished appearance. For EVA foam cosplay armor, edge banding is faster than sanding and eliminates the risk of losing detail.
Chemical Smoothing (Rigid Foam Only)
For rigid insulation foam, acetone or foam-specific solvent can smooth shredded edges by slightly melting the surface. Apply only to the edge with careful control. Warning: solvents release strong fumes and can damage some foam types. Do not use on EVA foam or polyethylene.
Preventing Edge Damage in the First Place
Blade lubrication reduces friction and produces edges needing minimal finishing. A hot wire cutter on rigid foam and electric carving knife on soft foam produce edges clean enough to use without finishing. Mark slightly outside your final dimension to provide a safety margin for sanding.
Safety Precautions and Health Considerations
Foam dust and fumes require attention regardless of the method you choose. When sanding foam, wear a dust mask or respirator to avoid inhaling particles (the CDC). When using a hot wire cutter, work in a well-ventilated area, as the melting process releases fumes that can irritate the lungs (the NIH).
Always use a sharp blade. A dull blade requires more force, increasing the risk of the knife slipping and causing injury. Cut away from your body and keep your free hand clear of the cutting path. The Occupational Safety and Health Administration guidance on hand and portable power tools outlines basic safety practices that apply directly to foam cutting.
For thermal cutting, the wire becomes extremely hot and can cause serious burns. Use a dedicated hot wire cutter with insulated handles, and never touch the wire while it is powered. Keep flammable materials away from your work area.
Common Mistakes to Avoid
Dull blades and excessive downward pressure top the list of shredding problems. Using the wrong tool for foam density is another frequent mistake, match the tool to the task. Skipping blade lubrication is also common; a few drops of oil dramatically reduces friction and transforms the cutting experience.
Conclusion
Cutting foam without shredding comes down to three principles: a sharp blade, the right tool for the foam density, and reduced friction through lubrication. Master these and you will produce clean, professional edges on every project.
Whether you are working with thin craft sheets or dense polyethylene rolls, FoamNoodles offers many foam products suited to any project. Our closed-cell polyethylene foam is designed to cut easily with a razor knife, and our bulk purchasing options make it affordable for DIY enthusiasts and professionals alike. Get started with FoamNoodles and bring your next project to life.

Frequently Asked Questions
What is the easiest way to cut foam without shredding?
A sharp utility knife with a fresh blade is the easiest method for most foam types. Use a straight edge as a guide, apply steady downward pressure without forcing the blade, and make multiple shallow passes rather than one deep cut. This technique works well for polyethylene foam, upholstery foam, and foam board. Keep your blade sharp, dull blades cause shredding by crushing foam fibers rather than slicing cleanly through them.
Can you cut foam with a regular kitchen knife?
A serrated kitchen knife can work for thin foam, but it's not ideal. Kitchen knives are rarely sharp enough and their blade design tends to compress foam rather than cut cleanly, leading to shredding and jagged edges. A utility knife with a sharp razor blade or a dedicated foam-cutting tool produces much better results. If you must use a kitchen knife, ensure it's extremely sharp and use a slow, gentle sawing motion.
How do you get a smooth edge on EVA foam?
After cutting EVA foam with your primary tool, smooth the edges using fine-grit sandpaper (150-220 grit) or a foam sanding block. For cosplay projects, some crafters use heat guns on low settings to gently melt and smooth foam edges, but this requires practice to avoid scorching.
What foam density should I choose for clean cutting?
Closed-cell polyethylene foam and rigid insulation foam cut more cleanly than open-cell foam because their structure resists shredding. Lower-density foam cuts easier but shreds more easily, while higher-density foam resists shredding but requires sharper blades and more cutting force. For DIY projects, medium-density foam offers a good balance of clean cutting and ease of use.