

Table of Contents
- What You'll Need Before Painting Craft Foam Sheets
- Preparing and Cleaning Your Foam Surface
- How to Prime Foam for Painting
- Best Paint for Craft Foam and Application Methods
- How to Spray Paint EVA Foam Without Damage
- Paint Craft Foam Without Cracking: Technique and Timing
- Common Mistakes to Avoid When Painting Foam Costumes
- Conclusion
- Frequently Asked Questions
Last Updated: October 9, 2026
What You'll Need Before Painting Craft Foam Sheets
Painting craft foam sheets for costumes requires a few basics, and paint craft foam sheets properly to ensure durable, flexible results. At FoamNoodles, we offer Polyethylene Flat Foam Rolls that are lightweight and easy to cut.

Gather your painting supplies:
- Primer, A foam-safe primer prepares the surface for paint
- Acrylic paint, Water-based acrylic is your best choice for craft foam
- Sealer, Protects your finished work from cracking and peeling
- Brushes and applicators, Foam brushes, soft bristle brushes, or spray equipment
- Water container, For rinsing and thinning paint
Mix equal parts white craft glue and water to create an affordable sealer that keeps paint from soaking into the foam and helps it adhere.
Preparing and Cleaning Your Foam Surface
A good paint job starts with prep work. Skip it and your paint cracks or peels.
Clean your foam sheet with a soft cloth or sponge and water to wipe away dust, debris, and cutting residue, paint won't stick to a dirty surface. Let it dry completely (at least 30 minutes), since wet foam absorbs paint unevenly. Sand any rough cut edges lightly with fine-grit sandpaper.
How to Prime Foam for Painting
Priming decides whether your paint job survives a weekend convention or flakes off by lunch. It creates a bridge between the slick foam and the paint film, so paint has something to grab when the piece flexes.
Why craft foam needs primer at all
Craft foam sheets have a smooth, low-energy surface. Water-based acrylic beads up on raw foam and soaks in unevenly, so unprimed pieces look blotchy and crack at creases. Primer seals those cells, gives paint a uniform surface to bond to, and adds a flexible layer that absorbs bending stress.
Foam-safe primers that actually work
Not every primer is safe for craft foam. Solvent-based automotive primers and lacquer fillers leave it gummy or melted. Stick to these categories:
- Water-based acrylic primer, Flexible, low odor, cleans up with water. Best all-around choice for thin craft foam sheets.
- Flexible brush-on primer made for foam props, Formulated to stay elastic after curing, so it moves with the foam instead of cracking.
- Glue-and-water base coat, Equal parts white craft glue and water. Cheap, effective, and works as a DIY primer when you do not want to buy a dedicated product.
- Spray primer labeled foam-safe, Convenient for large flat pieces, but check the label for foam compatibility before you commit.
Avoid: oil-based primers, lacquer primers, and any primer that lists acetone, toluene, or xylene on the label. These solvents eat craft foam.
Step-by-step priming
- Confirm the foam is clean and dry. Trapped dust or moisture shows through the finished paint.
- Test on a scrap piece. Prime a 2-inch square, cure 24 hours, then bend it. If it cracks or stays tacky, switch products.
- Apply the first coat thin. Load a foam or soft bristle brush lightly and work in one direction, wicking out pooled primer at seams and carved details.
- Let it dry, then apply a second thin coat. Water-based primers feel dry in 30-60 minutes; wait the full label time before recoating.
- Cure overnight before painting.
How much primer to use
A little goes a long way. For a standard 9x12 inch craft foam sheet, roughly a teaspoon of brush-on primer covers one thin coat. More means you're applying it too thick.
Primer compatibility quick reference
| Primer type | Flexibility after cure | Adhesion to craft foam | Risk of damaging foam | Best for |
|---|---|---|---|---|
| Water-based acrylic primer | High | Good | Low | Most costume pieces |
| Flexible foam prop primer | Very high | Excellent | Low | Wearable armor, joints |
| Glue-and-water base coat | High | Good | None | Budget builds, sealing raw foam |
| Foam-safe spray primer | Medium | Good | Low | Large flat panels |
| Oil-based or lacquer primer | Low | Poor | High (melts foam) | Do not use |
Best Paint for Craft Foam and Application Methods
Acrylic paint is the best choice for painting craft foam sheets. Water-based acrylic moves with the foam, resists cracking, and cleans up with water. Avoid oil-based paints and lacquers, too rigid, they crack when foam flexes.
Apply acrylic in multiple thin coats, the most important rule for durable results. Thin coats dry evenly and adhere better; thick paint cracks when foam bends.
How to Spray Paint EVA Foam Without Damage
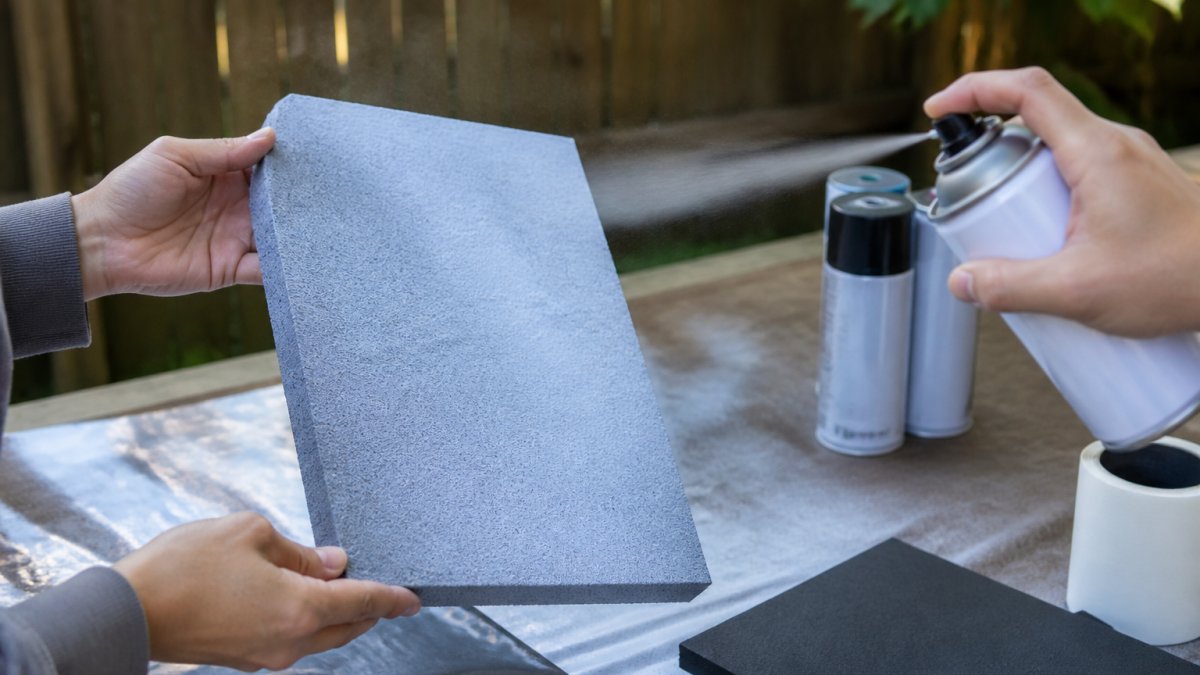
Spray paint is the fastest way to get smooth, even color on a large craft foam sheet, and the easiest way to ruin one. Solvent in most rattle cans attacks foam if laid on too heavy, and a thick coat turns brittle when the piece flexes.
Pick a foam-safe spray paint
Not every rattle can is safe for craft foam. Read the label first:
- Water-based acrylic spray paint, The safest choice. Low solvent load, flexible film, minimal risk of melting the foam.
- Spray paint labeled for foam or craft use, Formulated with a milder solvent package. Still apply in thin coats.
- General-purpose enamel or lacquer spray, High solvent content. Will eat craft foam on contact if applied heavy. Avoid unless the label explicitly says foam-safe.
If unsure, spray a scrap piece and let it sit for an hour. If the surface looks wrinkled, gummy, or melted, the paint is not compatible.
Spray technique that protects the foam
- Work outdoors or in a well-ventilated space. If indoors, open windows, run an exhaust fan, and wear a respirator rated for organic vapors.
- Hold the can 8-12 inches from the surface. Closer pits the foam; farther lets paint mist-dry into a gritty texture.
- Use short bursts, not a continuous stream. Continuous spraying dumps too much solvent in one spot.
- Overlap each pass by about 50 percent. Work left to right, then top to bottom, to prevent streaks.
- Stop while the coat still looks slightly thin. Hints of primer through the first pass are correct.
- Wait 30-45 minutes between coats, then apply 2-3 thin coats total. Recoating too soon traps solvent and causes wrinkling.
Temperature and humidity
Spray paint behaves best between 50-85°F with moderate humidity. Cold slows the cure and leaves a dull finish; heat above 85°F dries paint before it levels, producing a sandy texture; high humidity causes blushing, a cloudy white haze.
Testing flexibility before you commit
Before spraying your finished piece, spray a scrap of the same foam with the same coats and drying intervals, then cure 24 hours. Then:
- Bend test. Flex the scrap 90 degrees along the grain. The paint should stretch with the foam, not crack.
- Crease test. Fold the scrap sharply and unfold it. Deep cracks that expose bare foam mean your coats are too thick.
- Rub test. Drag a thumbnail across the painted surface. If paint lifts off in a sheet, adhesion failed.
- Wear test. Tape the scrap to a joint that moves, an elbow or knee, and wear it for an hour. Check for flaking at the flex points.
If the scrap fails any test, thin your coats, extend drying time, or switch to a more flexible spray product.
Spray troubleshooting
| Problem | Likely cause | Fix |
|---|---|---|
| Foam surface looks melted or wrinkled | Solvent-heavy paint applied too heavy | Switch to water-based acrylic spray, apply thinner coats |
| Gritty, sandy texture | Can held too far away, paint dried mid-air | Move to 8-12 inches, use short bursts |
| Cloudy white haze | High humidity during spraying | Wait for lower humidity, or spray indoors with dehumidifier running |
| Paint cracks at flex points | Coats too thick or not fully cured | Apply thinner coats, cure 24 hours before flexing |
| Uneven color | Passes not overlapped enough | Overlap each pass 50 percent, work in a consistent direction |
Paint Craft Foam Without Cracking: Technique and Timing
The biggest challenge when you paint craft foam sheets for costumes is preventing cracks and peeling. This comes down to technique and patience.
Flexibility is key: foam bends and flexes, especially in wearable costumes, and rigid paint cracks. Apply paint in thin layers, each barely visible, with primer showing through, for 3-5 coats of solid color, letting each dry completely before the next.
| Problem | Cause | Solution |
|---|---|---|
| Paint cracks when foam bends | Paint too thick or not fully dry | Apply thinner coats, wait longer between coats |
| Uneven coverage | Paint applied too thick or unevenly | Use thin, even coats in multiple passes |
| Paint peels off | Poor primer adhesion or paint too thick | Ensure primer is fully dry, apply thinner paint coats |
| Rough texture | Spray paint applied too close | Maintain 8-12 inch distance, use short bursts |
| Dull finish | Paint not fully cured | Wait 24-48 hours before final use |
Common Mistakes to Avoid When Painting Foam Costumes
Here are the pitfalls that derail most first-timers.
Thick paint coats. The number one mistake.
Not testing first. Every foam, primer, and paint combination behaves differently.
Rushing drying time. Paint that isn't fully dry cracks and peels.
Painting in wrong conditions. Paint in moderate temperatures (65-75°F) and humidity; avoid extremes.
Using cheap brushes. Cheap brushes shed bristles into your paint.
Ignoring surface prep. Dirty foam, rough edges, and dust show through finished paint.
Conclusion
Painting craft foam sheets for costumes is straightforward with the right process: clean and prep your foam, apply primer, then paint in thin acrylic coats. Wait patiently between coats and you'll get durable, flexible coverage that moves with your costume.
The foam sheets from FoamNoodles are engineered for projects exactly like this. Our Polyethylene Flat Foam Rolls offer flexibility and durability. View All foam options for your next project.
Frequently Asked Questions
What paint works best on craft foam sheets for costumes?
Acrylic paint is the best choice for craft foam sheets used in costumes. Water-based acrylic paints adhere well to foam, dry quickly, and remain flexible enough to prevent cracking when the costume is worn. Hobby paints and craft-store acrylics work effectively. Avoid oil-based paints and thick enamel formulations, as they can damage foam and become brittle. Always test your chosen paint on a sample piece first to confirm compatibility and finish quality.
Do you need to seal craft foam before painting?
Yes, sealing foam before painting is essential for costume durability and paint adhesion. A foam-safe sealer creates a protective barrier that prevents paint from soaking unevenly into the material and helps prevent peeling. Common sealers include diluted glue-and-water mixtures, foam-specific primers, or water-based sealers. Applying sealer also reduces the amount of paint needed and produces a more uniform finish. Allow the sealer to cure fully before moving to the priming stage.
How do you prevent paint from cracking on foam costumes?
Apply thin, even coats rather than one thick coat. Thick paint layers become rigid and crack when the foam flexes during wear. Use flexible acrylic paints designed for crafts, and allow adequate drying time between coats. Proper surface preparation with sealing and priming also improves flexibility. Test your finished piece by bending and flexing the painted foam gently before wearing the costume. If cracking occurs, sand lightly and apply an additional thin coat of flexible paint.
Can you spray paint EVA foam safely for costume armor?
Yes, spray paint works well on EVA foam when applied correctly. Use light, even coats from 6 to 8 inches away to avoid over-saturation that can damage the foam. Acrylic spray paint is safer than solvent-based options. Work in a well-ventilated area outdoors or in a garage. Apply multiple thin layers rather than one heavy coat. Allow drying time between applications. Always test on a scrap piece first to ensure the spray paint doesn't dissolve or degrade your foam material before committing to your costume piece.