

Table of Contents
- What You'll Need Before Cutting Foam
- Choosing the Right Foam Density for Kayak Outriggers
- Essential Tools for Cutting Foam
- Measuring and Marking Your Foam for Custom Fit
- Step-by-Step Cutting Techniques for Smooth Edges
- Using Jumbo Pool Noodles for Kayak Stability
- Cutting Closed-Cell Foam for Marine Use and Long-Term Performance
- Safety Precautions and Common Mistakes to Avoid
- Frequently Asked Questions
Last Updated: September 3, 2026
What You'll Need Before Cutting Foam
Gather closed-cell foam, a cutting tool, measuring device, safety equipment, and a template before starting. Work in a well-lit, ventilated space with everything organized to avoid interruptions.
| Item | Purpose | Notes |
|---|---|---|
| Closed-cell foam | Core material for stabilizers | 3-5 inch diameter recommended |
| Serrated blade or hot wire cutter | Primary cutting tool | Serrated blade for manual work |
| Measuring tape | Dimension verification | Accuracy prevents fitment issues |
| Marker or pencil | Marking cut lines | Dark color shows clearly on foam |
| Work gloves | Hand protection | Prevents splinters and cuts |
| Safety glasses | Eye protection | Guards against foam debris |
Choosing the Right Foam Density for Kayak Outriggers
Closed-cell foam with a density between 2-4 pounds per cubic foot balances buoyancy and rigidity (astm.org). Lower-density foam compresses too easily; higher-density foam adds unnecessary weight.
Understanding Buoyancy and Foam Volume
Foam buoyancy depends on volume, not density, one cubic foot displaces 62.4 pounds of water. Calculate required volume by subtracting your kayak's inherent buoyancy (typically 60-80% of loaded weight) from total loaded weight.
Example: A 300-pound loaded kayak with 180 pounds of inherent buoyancy needs 120 pounds of additional support. Two 5-inch-diameter foam tubes, each 4 feet long, provide approximately 2.2 cubic feet of volume, sufficient for this kayak.
Density affects rigidity and durability, not buoyancy. Medium-density closed-cell foam (3-3.5 lbs/cu ft) resists compression, maintains shape in rough water, and degrades more slowly than low-density alternatives.
Material Selection for Marine Conditions
Polyethylene resists water absorption and costs less; polyurethane offers better compression recovery and UV resistance. Both perform well in fresh and saltwater when properly sealed.
The protective skin on closed-cell foam prevents water infiltration. Cutting exposes cells beneath, so sealing cut edges with marine-grade sealant is essential.
Essential Tools for Cutting Foam
Two primary cutting options: serrated blade (affordable, suitable for DIY) or hot wire cutter (cleaner edges, requires more skill).
Use a fine-toothed serrated knife or foam-cutting saw for manual cutting. Electric serrated knives speed up multiple cuts. Hot wire cutters create smooth edges without compression and work best with a template guide.
Regardless of your tool choice, sharpness matters tremendously. Dull blades tear the foam instead of cutting cleanly, creating rough edges that affect hydrodynamics. Keep your blade sharp or replace it frequently during cutting. maintaining your kayak.
Measuring and Marking Your Foam for Custom Fit
Measure your kayak's hull width at the mounting point and the exact stabilizer length needed. Transfer measurements onto foam with a dark marker.
Create a cardboard or plywood template for multiple stabilizers to ensure consistency. Mark 45-degree angle cuts if needed. Double-check all measurements before cutting.
Mark reference lines every 6 inches to maintain a straight cutting path and prevent drift.
Step-by-Step Cutting Techniques for Smooth Edges
Secure foam firmly with clamps or a vise to prevent shifting and jagged edges. Position yourself for clear visibility and tool control.
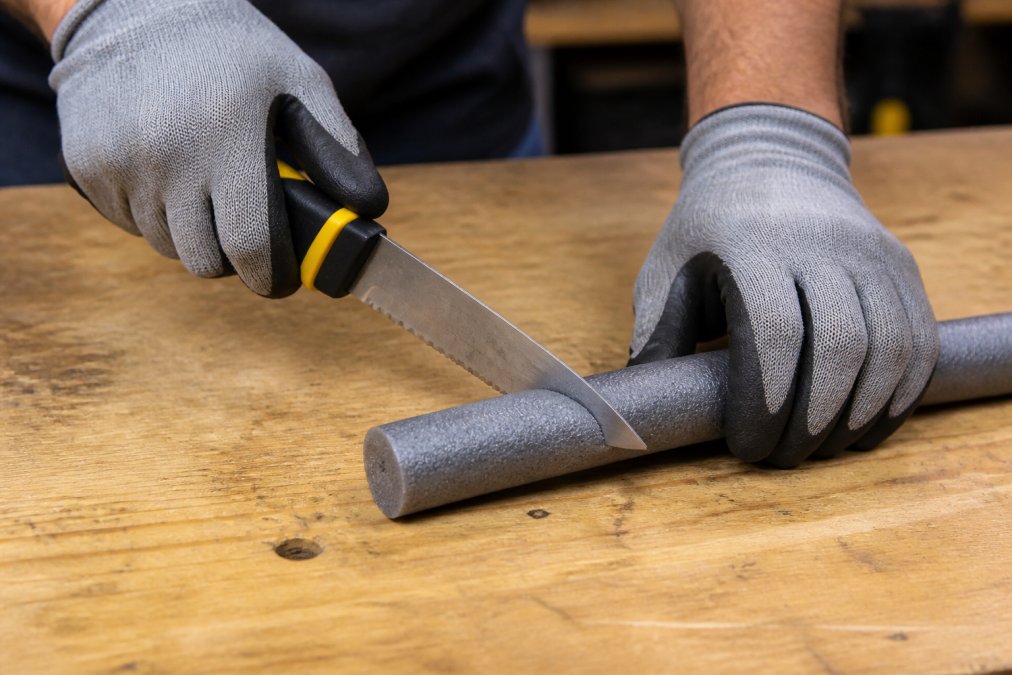
Use smooth, steady strokes with a serrated blade; let it do the work rather than forcing it. Maintain consistent pressure and reduce it near the cut line. Angle the blade gradually for 45-degree cuts.
Move a hot wire cutter steadily at consistent speed; the wire should glow orange-red, not white-hot. Practice on scrap foam first.
Inspect edges after cutting. Smooth minor roughness with 120-150 grit sandpaper in one direction to improve water flow and reduce drag.
Using Jumbo Pool Noodles for Kayak Stability
Jumbo pool noodles (5-6 inches diameter) offer affordable buoyancy with uniform shape that simplifies cutting and mounting.
Pool noodles are lightweight closed-cell foam with natural water resistance. Their main advantage is cost, especially for bulk purchases.
Pool noodles have less rigidity than backer rods. Use them for calm water; choose dedicated backer rods for rough water or high-performance paddling.

Cutting Closed-Cell Foam for Marine Use and Long-Term Performance
Closed-cell foam resists water absorption and maintains buoyancy. UV radiation and oxidative breakdown cause degradation; protective measures extend lifespan from 3-5 years to 7-10 years (peer-reviewed research).
UV Degradation and Protective Coatings
UV radiation causes brittleness and structural failure. Exposed foam degrades in 6-12 months; protected foam lasts 5-10 years. Store indoors or apply UV-protective coating for year-round mounting.
Apply marine-grade polyurethane sealant to all exposed surfaces, especially cut edges. Allow 24-48 hours to cure. This adds minimal weight and maintains appearance.
UV-blocking wraps (marine-grade vinyl tape) physically shield foam. Wrap in spiral pattern with 50% overlap. More labor-intensive but provides superior protection.
Sealing Cut Edges to Prevent Water Infiltration
Cutting exposes foam cells beneath the protective skin. Water penetrates through capillary action, reducing buoyancy and increasing weight. Sealing cut edges is essential.
Apply marine-grade sealant to all cut surfaces immediately after cutting. Use a putty knife or caulking gun to create a continuous seal. Allow 24-48 hours to cure before water exposure.
For durability, sand cut edges smooth, then apply two thin coats of sealant rather than one thick coat.
Water Absorption Testing and Maintenance Schedule
Monitor stabilizers annually for water absorption by weight. A 5-inch-diameter, 4-foot foam tube should weigh 8-10 pounds dry; over 12-14 pounds indicates absorption (peer-reviewed research).
If absorption is detected, dry the stabilizer in sunlight (3-7 days). Inspect for coating damage and reapply sealant to compromised areas.
Inspect stored stabilizers every 6 months for cracks, discoloration, or brittleness. Reapply coating for superficial damage; replace if brittleness is deep.
Safety Precautions and Common Mistakes to Avoid
Wear a dust mask, eye protection, and work gloves when cutting. Work in a well-ventilated area to disperse dust and fumes.
Secure foam with clamps or a vise to prevent shifting and jagged cuts. Keep blades sharp; dull tools tear foam instead of cutting cleanly.
Cut in a dry, well-lit workspace. Avoid rushing; speed causes mistakes that compromise performance.
Use only serrated blades, hot wire cutters, or specialized foam tools. Avoid power tools like circular saws or angle grinders. Practice on scrap foam first if uncomfortable.
Building kayak stabilizers requires precision and patience, but the results are worth the effort. Choosing quality closed-cell foam like the FILL-RITE backer rods from FoamNoodles ensures your stabilizers will perform reliably for years. The combination of proper foam density, careful measurement, and smooth cutting techniques creates stabilizers that enhance your kayak's stability without adding excessive weight. Start with FoamNoodles' closed-cell foam products and follow these techniques to create custom stabilizers that match your kayak perfectly. View All foam options and bulk purchasing packages to get started on your project today.
Frequently Asked Questions
What type of foam is best for kayak stabilizers?
Closed-cell foam is a good choice for kayak stabilizers because it resists water absorption, maintains buoyancy over time, and won't degrade in wet conditions. Closed-cell foam has a density that provides rigidity without excessive weight. Avoid open-cell foam, which absorbs water and loses buoyancy. FoamNoodles offers FILL-RITE closed-cell backer rods in 5-inch and 3-inch diameters, which are ideal for constructing custom outriggers that withstand marine use.
Can I use jumbo pool noodles for kayak outriggers?
Yes, jumbo pool noodles can work for kayak outriggers if they're made from closed-cell foam with sufficient density. Standard pool noodles are often lower density and may compress over time, reducing stability. Jumbo pool noodles provide more surface area and buoyancy displacement, making them suitable for kayak stability applications. Ensure they're closed-cell to prevent water absorption, and test them in shallow water before relying on them for offshore paddling.
What tools do I need to cut foam for kayak modifications?
A serrated bread knife works well for most foam cuts, but a hot wire cutter provides cleaner edges and is ideal for closed-cell foam. For precise 45-degree bevels and angled cuts, a utility knife with a sharp blade is essential. You'll also need a measuring tape, marking pen or pencil, a straight edge or template for guidance, and a cutting mat or work surface. Safety gear includes work gloves and eye protection to shield against foam particles and dust.
How do I seal foam after cutting it for water use?
After cutting closed-cell foam, seal exposed edges with waterproof adhesive or polyurethane sealant to prevent water penetration at cut surfaces. Apply the sealant along all edges and allow it to cure fully per manufacturer instructions. For long-term marine use, apply UV-resistant coating or marine-grade paint to protect against sun damage and oxidation. This extends the foam's lifespan and maintains buoyancy in harsh saltwater or freshwater environments.