

Table of Contents
- Types of Foam for DIY Projects and Home Crafts
- Choosing the Right Foam Density and Thickness
- Best Tools for Cutting EPE Foam at Home
- How to Glue Foam for DIY Projects
- How to Shape Foam for Cosplay Armor and Creative Props
- Affordable Foam Padding Options for Every Budget
- Foam Maintenance, Longevity, and Eco-Friendly Disposal
- Conclusion
- Frequently Asked Questions
Last Updated: September 20, 2026
Types of Foam for DIY Projects and Home Crafts
When you're planning a DIY project, the foam you choose makes all the difference. Understanding the types available helps you pick the right one for your affordable foam padding for DIY projects needs.
Polyethylene foam is the most versatile option for DIY work. It's lightweight, waterproof, and floats, making it ideal for both indoor crafts and outdoor applications. This closed-cell foam resists water absorption and offers excellent buoyancy, which explains why it's used in everything from protective padding to pool toys. The material cuts cleanly with a utility knife and bonds easily with common adhesives.
Solid-core foam rods and noodles work differently from sheet foam. These cylindrical pieces provide structure without a hollow center, making them ideal for backer rods, gap-filling, and decorative applications. They're particularly useful when you need consistent diameter and strength throughout a project.
The choice of materials depends on your specific application. Protective padding projects favor polyethylene for its durability. Construction and sealing tasks call for solid-core backer rods that maintain shape under pressure.
Choosing the Right Foam Density and Thickness
Density determines how much weight your foam can support and how quickly it compresses. This matters enormously when you're selecting affordable foam padding for DIY projects, especially if the finished piece will bear any load.
Low-density foam (under 2 lbs per cubic foot) compresses easily and feels soft. It's excellent for comfort applications like cushioning furniture edges, protecting fragile items during moving, and creating plush decorative elements. The tradeoff: it won't support significant weight and degrades faster under repeated compression.
Medium-density foam (2-4 lbs per cubic foot) balances softness with durability. This range works for most DIY applications, upholstery padding, craft props, protective packaging, and shock absorption. It holds its shape reasonably well while remaining easy to cut and shape.
Thickness matters equally. A 1/2-inch sheet works for light padding and craft applications. One-inch thickness provides better cushioning and insulation. For protective padding around pipes or edges, 5/8-inch diameter rods offer a practical middle ground.
Consider your end use: if you're padding furniture edges, 1/2-inch polyethylene offers enough protection. For gap-filling and caulking applications, thicker backer rods (like 5-inch diameter) seal larger spaces more effectively in a single application.
| Foam Type | Best Density | Ideal Thickness | Primary Use |
|---|---|---|---|
| Polyethylene sheets | 2-3 lbs/cu ft | 1/2" to 1" | Padding, crafts, protection |
| EVA foam | 1-2 lbs/cu ft | 1/2" to 1" | Cosplay, props, costumes |
| Backer rods | Solid core | 5/8" to 5" diameter | Sealing, gap-filling |
| Craft noodles | Light | 5/8" to 2" diameter | Decoration, modeling |
Best Tools for Cutting EPE Foam at Home
Cutting foam cleanly without crushing or tearing it requires the right tools and technique. EPE (expanded polyethylene) foam cuts more predictably than some alternatives because it has consistent cell structure throughout.
A utility knife with a sharp blade is your primary tool. Keep the blade fresh, dull blades crush foam instead of slicing it. Use a straightedge or metal ruler as a guide, and apply steady, even pressure rather than aggressive sawing motions. Multiple light passes work better than one heavy cut.
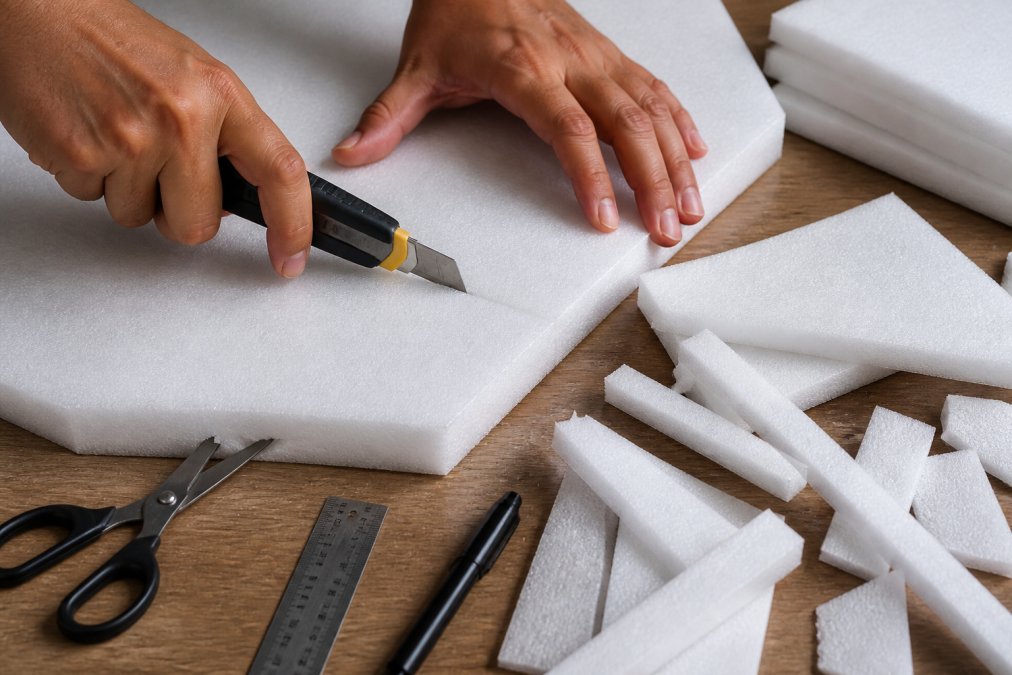
For thicker foam or high-volume projects, a hot wire foam cutter delivers cleaner results. The heated wire melts through foam without crushing it, leaving smooth edges. These tools are optional for occasional DIYers but invaluable if you're cutting dozens of pieces.
A serrated bread knife works surprisingly well for foam. The teeth grip without crushing, and the flexibility of a kitchen knife lets you follow curves more easily than a rigid utility blade. Rinse it after use since foam particles cling to the serrations.
Band saws and circular saws can work, but they create more dust and require careful technique. If you go this route, wear a dust mask, foam particles are irritating to inhale.
The fundamental rule: keep your blade sharp, use a guide for straight cuts, and let the tool do the work. Pressing hard doesn't cut faster; it just crushes the material and creates jagged edges.
How to Glue Foam for DIY Projects
Not all adhesives work equally well on foam. Some solvents dissolve the material, while others create weak bonds that fail under stress.
Spray adhesive (polyurethane-based) bonds foam to foam and foam to other materials reliably. Apply light, even coats to both surfaces, wait 30 seconds for tackiness, then press together. The advantage: quick setup and strong permanent bonds. The disadvantage: overspray is hard to control, and the fumes require ventilation.
Hot glue guns work for light applications and craft projects. The bond sets quickly, making them useful for temporary assembly or positioning pieces before permanent adhesive cures. Don't rely on hot glue for load-bearing applications, it's not strong enough.
Oodles of Noodles 5/8” × 20 ft Foam →
Contact cement creates an instant, permanent bond when both surfaces are coated and pressed together. It's excellent for bonding foam to wood, metal, or other foam. Apply to both surfaces, wait for the specified open time (usually 5-10 minutes), then press firmly. Once contact is made, you can't reposition, measure twice.
Polyurethane construction adhesive (like Gorilla Glue) works on foam but expands as it cures. Use sparingly, excess adhesive creates messy overflow. Clamp or weight the pieces while curing.
Avoid solvent-based adhesives like super glue or acetone-based products. These dissolve foam rather than bond it, leaving weak, brittle joints.
The best choice depends on your project timeline and material combination. Quick craft assembly? Hot glue. Permanent furniture padding? Spray adhesive. Bonding foam to wood framing? Construction adhesive.
How to Shape Foam for Cosplay Armor and Creative Props
Shaping foam transforms flat sheets into dimensional props, armor pieces, and costume elements. The techniques vary depending on your material and desired result.
Carving and layering builds dimension without heat. Stack sheets of different thicknesses, glue them together, then carve away material to create depth and detail. This approach gives you precise control and works on any foam type. A Dremel rotary tool with a cutting wheel speeds up the process, though a utility knife works for simpler shapes.
Painting and texturing add visual complexity without changing the foam's physical shape. Primers and flexible paints adhere well to foam. Stippling with a sponge, drybrushing for weathering, and airbrushing for gradients all create convincing armor and prop details.
Sealing edges prevents foam from looking unfinished. Sand rough edges smooth, then apply a thin coat of paint or sealant. This also prevents foam from shedding particles during wear.
The learning curve is gentle because foam forgives mistakes. Carved detail doesn't match your vision? Add more foam on top or carve deeper. This makes foam the ideal material for first-time prop builders.
Affordable Foam Padding Options for Every Budget
Your budget doesn't have to limit your foam projects. Multiple options exist at different price points, and buying in bulk significantly reduces per-unit costs.
Small starter quantities work well if you're testing a project or learning techniques.
Foam Maintenance, Longevity, and Eco-Friendly Disposal
Foam lasts longer when you protect it from certain conditions. UV exposure degrades polyethylene over time, causing brittleness and discoloration. If your foam project lives outdoors, paint or seal it to block direct sunlight. Indoor foam, properly stored, remains usable for years.
Conclusion
Affordable foam padding for DIY projects transforms how you approach creative work, home improvements, and protective applications. Whether you're building cosplay armor, padding furniture edges, or sealing expansion joints, the right foam material and technique make the difference between frustration and success.
Frequently Asked Questions
What is the most cost-effective foam for DIY projects?
EPE (expandable polyethylene) foam offers the best value for most DIY applications. It's lightweight, durable, and affordable foam padding that works for upholstery, cushioning, and craft projects. The Polyethylene Flat Foam Roll ($149.99 for 50 feet) breaks down to roughly $3 per foot, making it economical for large projects. For smaller budgets, the Oodles of Noodles Bits ($14.99) provide versatile scraps perfect for testing designs before committing to larger purchases.
How do I choose the right thickness for foam padding?
Thickness depends on your project's load and comfort requirements. For cushioning furniture or seating, 1/2-inch foam provides adequate support for light use. For protective padding on edges or during transport, 5/8-inch thickness offers better impact absorption. The Oodles of Noodles 5/8" foam noodles work well for edge protection, while the 1/2-inch Polyethylene Flat Foam Roll suits general cushioning and craft applications. Test with smaller pieces before buying bulk quantities.
Can I use EPE foam for upholstery and craft projects?
Yes, EPE foam works for both upholstery and crafts. Its resilience and compression properties make it suitable for cushioning furniture, while its versatility allows easy cutting and shaping for costumes, props, and decorative projects. The Polyethylene Flat Foam Roll is specifically designed for custom case inserts, craft projects, and padding applications. Its excellent buoyancy and tear resistance ensure durability across different uses, from home décor to protective cushioning.
What are the best ways to cut foam for custom shapes?
A sharp utility knife or serrated bread knife works best for clean cuts on flat foam sheets. For curved or intricate shapes, an electric carving knife or hot wire cutter provides precision. Start with light pressure and multiple passes rather than forcing a single cut. The Polyethylene Flat Foam Roll and Oodles of Noodles foam products are designed to cut easily with standard tools. Always work on a stable surface and keep your hands clear of the blade path.
How can I save money on foam supplies for large DIY projects?
Buy in bulk using master rolls or multi-packs to reduce cost-per-square-inch. The Master Roll Foam Sheet ($879.99 for 200 feet) offers significant savings for contractors and serious DIYers. The FILL-RITE 6-pack ($249.99) provides bulk backer rod at a lower per-unit cost than individual purchases. Start with smaller quantities to test your project, then scale up. Free shipping on bulk orders further reduces overall expenses for large-scale applications.