

Is Craft Foam Waterproof for Outdoor Projects?
Editorial TeamTable of Contents
- Is Craft Foam Waterproof? The Short Answer
- What Happens When EVA Foam Gets Wet
- How to Seal Craft Foam for Outdoor Use
- Best Paint for Craft Foam Outdoors
- Craft Foam Outdoor Durability: What to Expect
- Matching Foam Type to Your Outdoor Project
- Setting Realistic Expectations
- Frequently Asked Questions
Last Updated: October 14, 2026
Is Craft Foam Waterproof? The Short Answer
No, standard craft foam is not waterproof on its own. Untreated craft foam will soak up water over time, and repeated rain or pool splash will break it down.

Here is the part most guides skip: the foam itself is rarely the problem. The surface is. A sealed edge and a proper topcoat do more for outdoor life than any single product claim.
So what actually happens when water meets foam? It comes down to cell structure.
What Happens When EVA Foam Gets Wet
Water behaves very differently depending on how the foam was made. The foam itself is a closed-cell material, and that structure decides how it handles moisture.
Closed-Cell vs. Open-Cell Foam
Closed-cell foam is foam where the gas pockets are sealed off from each other, so water has nowhere to travel through the material. Open-cell foam is foam with connected pockets, which lets water wick inward like a sponge.
That single difference explains almost everything about outdoor performance. Closed-cell foam floats and sheds water. Open-cell foam soaks it up and holds it.
How Different Foam Types React to Moisture
Not every foam on a craft shelf behaves the same way outdoors:
- Polyethylene foam: Closed-cell and tough, resists mildew, mold, and rot, so it holds up to moisture well
- Craft foam board: Paper-faced, the face swells and peels when wet
- Foam core: Paper skins over a foam center, warps fast in damp air
- Florist foam: Open-cell by design, made to absorb water, never meant for rain
- Spray foam: Expands and cures in place, used for filling gaps, not for craft shapes
If your project will sit outside, start with a closed-cell foam. That choice matters more than any coating you add later.
How to Seal Craft Foam for Outdoor Use
Sealing is a two-part job: prepare the surface, then build up thin coats. Rushing either step is the most common reason a sealed project fails within a season.
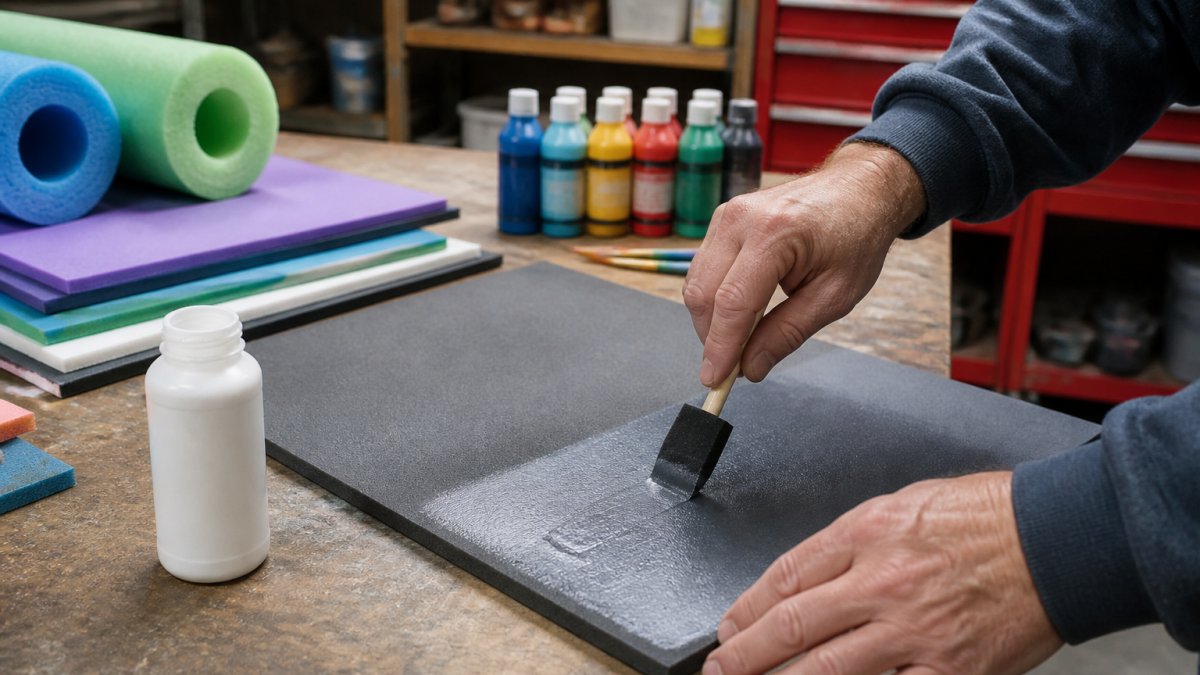
Pick a Coating That Will Not Eat the Foam
Before you buy anything, check what the coating is dissolved in. Foam is a plastic, and some solvents soften, wrinkle, or melt it on contact.
A quick compatibility test costs nothing: brush a dime-sized patch on a scrap of the same foam, wait the full cure time, then flex it. If the foam is pitted, gummy, or the coating flakes when bent, try a different product. Never test on the finished piece.
Step-by-Step: Preparing and Sealing Your Foam
Total time: About 1 hour of hands-on work, plus drying time between coats.
What you'll need:
- Closed-cell craft foam, such as our Polyethylene Flat Foam Roll
- A flexible sealant or coating made for foam
- Foam brushes or a small roller
- Fine sandpaper
- Soapy water and a clean cloth
- Gloves and a well-ventilated space
Step 1: Clean the surface. Wipe away dust, oils, and mold-release residue with soapy water.

Step 3: Apply a thin first coat. Brush on a light layer.
Step 4: Let it cure. Follow the product's cure time.
Step 5: Add a second coat. Two thin coats beat one heavy coat every time.
Step 6: Seal the cut edges. Edges are where water gets in first.
Waterproof vs. Weatherproof: Know Which One You Need
These two words get used interchangeably, and they should not be. Waterproof means water cannot pass through the material at all. Weatherproof means the piece can survive the outdoors, sun, temperature swings, rain, and wind, without falling apart, even if a little moisture gets in.
Match your method to the exposure:
- Brief splashes and quick rinses: A single thin seal coat is usually enough.
- Rain and repeated wetting: Two coats plus sealed edges, with a flexible topcoat that moves with the foam.
- Standing water or constant splash: Closed-cell foam, three coats on edges, and a recoating schedule.
- Prolonged sun plus rain: Add a UV-resistant topcoat over the sealant, since the sealant takes the sun damage so the foam does not.
If your project only sees the occasional splash, you can stop at one coat. If it lives outside year-round, plan for the full stack: closed-cell foam, sealed edges, flexible sealant, and a UV topcoat.
Best Paint for Craft Foam Outdoors
The best paint for craft foam outdoors is a flexible acrylic made for foam, followed by a clear sealant on top. Rigid paints crack when the foam flexes, and cracks let water straight through.
Look for these traits:
- Flexible when dry, so it bends with the foam instead of flaking
- Foam-safe, meaning the solvent will not eat the material
- Water-resistant once cured, not just while wet
- Layered thin, since thick paint pools and cracks
Paint alone is not a waterproof finish. Treat it as color, then seal over it. For more background on how coatings behave on foam, the Occupational Safety and Health Administration guidance on solvent exposure is a useful reminder to work in a ventilated space when using solvent-based products.
Craft Foam Outdoor Durability: What to Expect
Craft foam outdoor durability depends on three things: the foam type, the quality of your seal, and how much sun and rain the piece sees. A sealed closed-cell piece can last a full season or more.
Most practitioners find that the coating wears out before the foam does. That is good news, because it means maintenance, not replacement, is usually the answer. Plan on some upkeep. Recoat high-wear pieces once a season, and check edges after heavy storms.
UV Rays, Sunlight, and Extreme Temperatures
Sunlight is the slow killer. UV rays break down foam surfaces over months, which causes fading, chalking, and a brittle feel. Sealed foam holds up far better because the coating takes the UV hit instead of the foam.
Temperature swings matter too. Foam expands in heat and shrinks in cold, and that movement works on every seam and coat. Flexible sealants handle that flex. Rigid ones crack.
What Actually Ends a Foam Project's Life
Four failure modes account for most outdoor foam breakdowns:
- Coating wear: Thin spots rub through, exposing bare foam to rain and sun.
- Edge intrusion: Water wicks in at cut edges, then spreads under the coating and lifts it.
- UV embrittlement: The surface chalks and cracks, and the piece loses flexibility.
- Impact damage: Dents and punctures break the seal and let moisture in.
Knowing which one is most likely for your project tells you where to focus your inspection.
Inspection and Recoating Schedule
A simple maintenance routine keeps pieces going:
- After every storm: Check edges and seams for lifting, bubbling, or dark spots.
- Monthly in sun-heavy spots: Look for chalking, fading, or a chalky film that rubs off on your hand.
- Before each season: Recoat worn spots before they spread, touch-ups are cheaper than rebuilds.
- Year-round: Store removable pieces out of direct sun when not in use, and rinse off dirt so it does not trap moisture against the surface.
When you recoat, clean the surface first, sand any rough spots, and apply the same coating family you used originally. Mixing incompatible coatings can cause the new layer to lift the old one.
Testing a Finished Project Before You Trust It
Before you commit a finished piece to the outdoors, run a small-sample test. Coat a scrap of the same foam with the same products and the same number of coats, then:
- Splash test: Pour water over it and watch whether it beads or soaks in.
- Soak test: Leave it in a shallow dish of water for an hour and check for darkening or soft spots.
- Flex test: Bend it and look for cracks in the coating.
- Sun test: Leave it in direct sun for a few days and check for fading or chalking.
Signs of failure to watch for: water darkening the foam, edges that feel soft or spongy, coating that peels when you scratch it with a fingernail, or a chalky residue that rubs off. If any of those show up on the scrap, adjust your method before you coat the real piece.
Matching Foam Type to Your Outdoor Project
The right foam depends on where the piece will live. Here is how we would match them:
| Project | Best Foam Choice | Why It Works |
|---|---|---|
| Garden markers and signs | Sealed polyethylene sheet | Closed-cell, sheds rain |
| Backyard waterfall trim | Sealed polyethylene foam | Handles constant splash |
| Halloween props | Sealed EVA foam | Light, easy to shape |
| Planter inserts | Sealed closed-cell foam | Resists mold and rot |
| Pool and water toys | Polyethylene foam | Buoyant and mildew-resistant |
| Fresh flower arrangements | Florist foam | Made to hold water indoors |
For most outdoor builds, a closed-cell sheet is the safest starting point. Our Polyethylene Flat Foam Roll is closed-cell, easy to cut with a razor knife, and impervious to mildew, mold, and rot, which is exactly what an outdoor piece needs. If you want a lighter, rounder shape for props, our 8 Pack Sticks Craft Foam gives you 35-inch cylinders in five colors that seal the same way.
Setting Realistic Expectations
Sealed craft foam holds up outdoors. Unsealed craft foam does not. That is the whole answer, and it is worth repeating because so much conflicting advice floats around this topic.
A few honest notes before you start. Sealing adds time and cost to every project. Some coatings change the look and feel of the foam, and a few will not stick to certain finishes.
For readers who want a coating comparison, the U.S. Environmental Protection Agency's Safer Choice program lists products screened for safer chemistry, which helps when you are choosing a sealant for a project kids will handle.
At FoamNoodles, we stock closed-cell craft foam in bulk rolls and packs, and every order ships fast and free.
Frequently Asked Questions
Is craft foam waterproof?
Most craft foam is water-resistant, not fully waterproof. Closed-cell foams like EPE resist moisture absorption better than open-cell options, but prolonged exposure to rain or standing water can still cause damage over time. To make craft foam suitable for outdoor projects, apply a foam-safe sealant or protective coating. This creates a barrier that keeps moisture out and extends the foam's lifespan significantly.
How long can craft foam last outside?
Unprotected craft foam left outdoors may degrade within weeks to a few months, depending on sun exposure, rain, and temperature swings. Sealed and painted foam can last six months to over a year in moderate conditions. For permanent outdoor displays, plan to inspect and reapply sealant regularly. UV rays and moisture are the two biggest factors that shorten craft foam outdoor durability, so shading or storing pieces during harsh weather helps.
Can you paint craft foam for an outdoor project?
Yes, but you need the right paint. Flexible acrylics designed for foam work well because they bend with the material instead of cracking. Avoid solvent-based paints that can eat into the foam surface. Apply thin coats and let each one dry fully before adding the next. Finish with a sealant on top of the paint for the best protection against rain and UV rays. Testing on a scrap piece first is always a good idea.
How do you seal craft foam for outdoor use?
Start by cleaning the foam surface to remove dust and oils. Apply a foam-safe sealant, such as a flexible acrylic coating or a specialized foam sealer, using a foam brush. Use thin coats rather than one thick layer, and let each coat dry completely before adding the next. Two to three coats usually provide solid protection. Pay extra attention to edges and cut surfaces, since those areas absorb moisture fastest. Reapply the sealant every few months for pieces kept outside.
Outdoor foam projects fail for one reason: water gets in where the seal does not reach. FoamNoodles carries closed-cell craft foam built for that job, from flat rolls you can cut to size to foam sticks for props and shapes. Browse our full range, compare sheet sizes, and get the foam that holds up season after season. View All