

Sealing Vertical Expansion Joints: Best Practices
Editorial TeamLast Updated: October 23, 2026
Quick Summary
Sealing vertical expansion joints well comes down to three habits: clean, dry joint faces, backer rod set so sealant depth is roughly half the joint width, and a non-sag sealant matched to the joint's movement. Apply from the bottom up, tool once, and protect the bead through full cure.
- Vertical joints need a non-sag sealant; self-leveling sealant belongs on horizontal surfaces only.
- Sealant depth should be about half the joint width, minimum 1/4 in. and maximum about 1/2 in.
- Choose backer rod slightly larger than the joint width so it fits snugly without adhesive.
- Apply sealant from the bottom up and tool upward to avoid sagging.
- Most non-sag polyurethane and silicone sealants fully cure in 3 to 7 days.
Table of Contents
- Why Vertical Expansion Joints Fail (and What Good Sealing Looks Like)
- How to Prepare an Expansion Joint for Sealant
- Choosing the Right Sealant for a Vertical Wall Joint
- Concrete Expansion Joint Backer Rod: Sizing and Installation
- Expansion Joint Sealant Depth: Getting the Ratio Right
- Step-by-Step: Applying Sealant to a Vertical Joint
- Expansion Joint Sealant Curing Time and Inspection
- Troubleshooting Common Vertical Joint Failures
- Frequently Asked Questions
Why Vertical Expansion Joints Fail (and What Good Sealing Looks Like)
Most failed wall joints fail because of bad geometry, not bad sealant.
A vertical expansion joint is a deliberate gap between two wall sections that lets them move without cracking. Sealing it differs from a floor joint: gravity pulls the sealant down, wind drives rain sideways into the gap, and the joint opens and closes with temperature changes year-round.
At FoamNoodles, we sell backer rod to contractors and DIY crews who hit this problem constantly. Here's what goes wrong:
- Sealant applied too shallow, so it tears when the joint moves
- No backer rod, so the sealant sags and bonds to the joint bottom
- Dirty joint faces, so adhesion fails within a season
- The wrong sealant type for a vertical surface
Good sealing looks boring: a recessed, uniform, slightly curved bead that stays put through summer heat and winter contraction. Here's how to get there.
How to Prepare an Expansion Joint for Sealant
Preparation decides whether the sealant lasts one year or ten. The joint must be clean, dry, and frost-free before anything goes in.
Work through this sequence:
- Clear the joint of loose concrete, mortar, and debris with a stiff brush or wire tool.
- Remove dust with a vacuum or oil-free compressed air. Dust is the number one adhesion killer.
- Check for moisture. Damp joint faces trap water under the sealant.
- Confirm the joint is frost-free in cold weather work.
- Mask the wall faces with painter's tape if you want a clean edge.
Most guides skip this: check joint width along its full height. Vertical joints in masonry and concrete often vary, especially in older walls, so note the narrowest and widest points before buying.
Removing Old Sealant Without Damaging the Joint
Old sealant has to come out completely, new sealant won't bond to it, and a partial repair just fails again. Use a hook blade, oscillating tool, or stiff putty knife, blade flat against the face so you don't gouge concrete or chip brick. Then clean the faces to bare substrate; for stubborn residue, use the maker's recommended solvent and let the joint dry fully.
Choosing the Right Sealant for a Vertical Wall Joint
Vertical joints need a non-sag sealant, sometimes labeled "vertical grade." A self-leveling sealant belongs on horizontal surfaces only. Put it in a wall joint and it runs out before it cures.
Here's how the main families compare:
| Sealant Type | Movement Capability | Best For | Watch Out For |
|---|---|---|---|
| Polyurethane | High | Concrete and masonry wall joints | Needs primer on some substrates |
| Silicone | High | Glazing, curtain walls, metal | Poor paintability |
| Acrylic latex | Low | Interior and light exterior use | Not for high-movement joints |
| Butyl | Low to moderate | Concealed or low-exposure joints | Limited UV resistance |
For most exterior concrete and masonry wall joints, polyurethane sealant is the workhorse: it handles thermal movement, bonds well to concrete, and holds up to weather. Silicone suits glazing and metal curtain walls, flexible and UV resistant, but not paintable. Acrylic and butyl suit interior partitions and low-movement joints.
Concrete Expansion Joint Backer Rod: Sizing and Installation
Backer rod is the foam rod that sets sealant depth and stops the sealant bonding to the joint bottom, giving two-point adhesion so the sealant stretches instead of tearing.
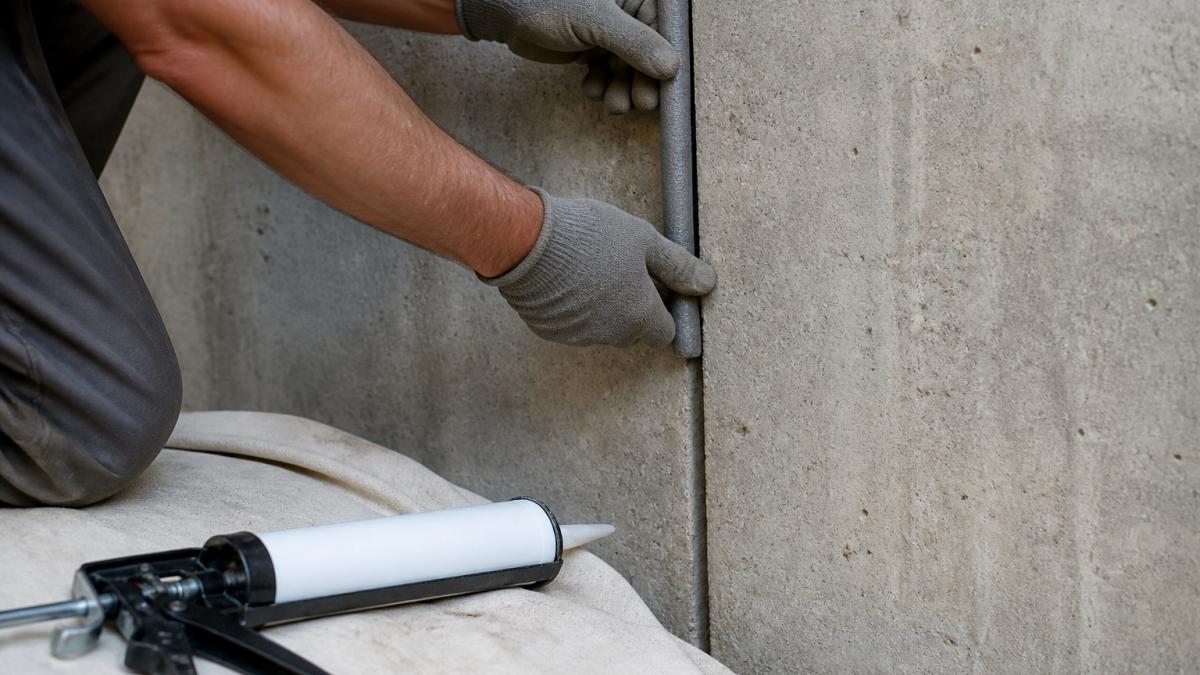
Sizing rule: choose a rod diameter slightly larger than the joint width. The rod should fit snugly and stay in place without adhesive. If it falls out, it's too small.
For concrete wall joints, our backer rod options are sized for exactly this job.
Installation steps:
- Select the correct rod diameter for the joint width.
- Seat the rod with a blunt, flat-sided tool or roller. Never use a sharp tool.
- Push it to the depth the sealant manufacturer specifies.
- Don't puncture, fold, or overstretch the rod. The water-resistant outer skin matters.
Our FILL-RITE pre-caulking filler rope backer rod bulk roll comes in sizes from 1/4" up to 1-1/4", so you can match narrow glazing joints and wider wall joints from one supplier. For small repairs, the small-quantity backer rods cover 1/4" through 3/4" without buying a full box.


Expansion Joint Sealant Depth: Getting the Ratio Right
Sealant depth is the most controllable variable in a vertical joint.
Here's how that plays out across common joint widths:
| Joint Width | Target Sealant Depth | Backer Rod Diameter |
|---|---|---|
| 1/4 in. | 1/4 in. (minimum) | 1/4 in. |
| 3/8 in. | 3/16 in. to 1/4 in. | 3/8 in. |
| 1/2 in. | 1/4 in. | 1/2 in. |
| 3/4 in. | 3/8 in. | 3/4 in. |
| 1 in. | 1/2 in. (maximum) | 1 in. |
| 1-1/2 in. | 1/2 in. (maximum) | 1-1/2 in. |
Why the ratio matters on a vertical joint. A shallow bead has too little cross-section to absorb movement and tears down the middle.
Checking depth before you caulk. Seat the rod, then measure the remaining pocket with a ruler or depth gauge at several points along the joint height, including the narrowest and widest points.
For a deeper explanation of how foam backer rods control depth in joints, we cover the mechanics.
Step-by-Step: Applying Sealant to a Vertical Joint
Here's the sequence for a clean, lasting bead.
FILL-RITE Pre-Caulking Filler Rope Backer Rod Roll Bulk. Sizes: 3/8", 5/8" →
What you'll need:
- Non-sag polyurethane or silicone sealant
- Caulking gun
- Backer rod in the correct diameter
- Primer if the sealant maker requires it
- Painter's tape
- Blunt tooling tool
- Rags and solvent
Step 1: Prep the joint. Clean, dry, frost-free. Mask the wall faces.
Step 2: Install the backer rod. Seat it to the correct depth with a blunt tool.
Step 3: Prime if required. Follow the sealant manufacturer's spec for your substrate.
Step 4: Load and cut the nozzle. Cut at an angle slightly narrower than the joint.
Step 5: Apply from the bottom up. Push the bead into the joint.
Step 6: Tool the joint. Run a blunt tool along the bead in one pass.
Step 7: Pull the tape while the sealant is still wet.
Tooling and Finishing Without Sag
Tooling forces the sealant against both joint faces and creates the concave curve that helps it flex. Do it once, firmly, and don't go back over it.
On a vertical joint, work upward. Tooling downward drags sealant out of the joint and causes sag. Keep the tool damp with the maker's recommended solvent if the sealant starts to stick.
If the bead starts to slump, stop. That usually means the sealant isn't vertical grade, or the joint is overfilled.
Expansion Joint Sealant Curing Time and Inspection
Curing is where a good installation either holds or quietly fails. Skin-over time is not cure time, and treating them as the same thing causes premature failure.
Typical cure windows. Most non-sag polyurethane and silicone sealants skin over in 30 to 90 minutes at 70°F and 50% relative humidity.
What to protect during cure:
- Keep water off the joint until fully cured. Rain on a freshly skinned bead can cause bubbling or adhesion loss.
- Don't tool, touch, or test the bead after skin-over.
- Avoid painting over the sealant unless the maker lists it as paintable.
- Keep traffic and equipment away from the joint face during the cure window.
Inspection after full cure. Wait the full cure window, then inspect. Look for:
- Gaps or voids along either joint face, a sign of poor tooling or insufficient sealant volume.
- Bubbles or pinholes in the bead, usually moisture or substrate outgassing.
- Sagging or bulging, wrong sealant grade or overfilled joint.
- Poor adhesion, the bead peels away cleanly from one face, often with a glossy imprint of the substrate.
- Cracking down the middle, sealant too shallow or movement rating too low for the joint.
Pass/fail check. A properly cured bead is recessed, uniform, slightly concave, and bonded to both joint faces but not the backer rod. Press gently with a blunt tool: it should feel firm and resilient, not soft or tacky.
Troubleshooting Common Vertical Joint Failures
Most vertical joint failures trace back to one of five causes. Here's how to diagnose and fix each.
| Symptom | Likely Cause | Fix |
|---|---|---|
| Bead sagging or running | Self-leveling sealant used vertically | Remove and reapply with non-sag sealant |
| Sealant peeling off one face | Poor cleaning or missing primer | Strip, clean, prime, reapply |
| Cracking down the middle | Sealant too shallow or wrong movement rating | Rebuild depth with backer rod, use higher-movement sealant |
| Bubbles in the bead | Moisture or outgassing from substrate | Let joint dry fully, check backer rod compatibility |
| Bead torn at movement | Three-point adhesion (bonded to joint bottom) | Install backer rod to break the bond |
A common mistake is caulking over a failed bead. It looks fixed for a month, then fails again in the same spot. Strip it out and fix the cause.
Sealing vertical expansion joints well comes down to three habits: clean joints, correct backer rod depth, and a non-sag sealant matched to the movement. Get those right and the bead holds for years, not seasons.
FoamNoodles stocks closed-cell polyethylene backer rod in sizes from 1/4" to 4", with bulk rolls for big jobs and small-quantity packs for repairs.
Frequently Asked Questions
How do you keep sealant from sagging in a vertical expansion joint?
Sagging happens when the sealant is too soft for the joint or the bead is too deep. Use a vertical-grade, non-sag sealant rather than a self-leveling one. Install backer rod so the sealant depth stays within the manufacturer's recommended width-to-depth ratio, usually no deeper than the joint is wide. Tool the bead firmly against both sides of the joint right after application, and apply in cooler conditions when the sealant is less fluid.
Do vertical expansion joints need a backer rod?
Yes. A backer rod controls sealant depth, prevents three-sided adhesion, and gives the sealant a round profile so it can stretch and compress with movement. Closed-cell polyethylene backer rod works with most cold-applied urethane, silicone, and acrylic sealants and does not need a separate bond breaker. Choose a rod slightly wider than the joint so it seats with light compression and stays in place on a vertical wall.
How deep should sealant be in an expansion joint?
Sealant depth should follow the manufacturer's width-to-depth ratio, which for many joints means the sealant is no deeper than the joint is wide. A joint 1/2 inch wide typically takes about 1/4 to 1/2 inch of sealant over the backer rod. Too little sealant tears under movement; too much wastes material and can sag. Always check the sealant label for the exact ratio before you fill.
How long does expansion joint sealant take to cure?
Curing time depends on the sealant type, joint depth, temperature, and humidity. Most urethane and silicone sealants skin over within a few hours and reach full cure in several days, while deeper joints take longer. Follow the manufacturer's stated cure schedule, keep the joint dry during curing, and avoid painting or cleaning the area until the sealant has fully cured.
